你家封口机是否出现过封杯不严的情况?
你关闭电源调整胶膜后还是没有解决问题,这时你就要看看封口机的刀片上是否有一层厚厚的积碳了。

这是胶膜高温之后留下的残渣碳化,是在操作时避免不了的问题。那如何清洗封口机刀片上的积碳呢?
我们联系了铠玮乃士、耐雪两家封口机专业厂商,让专业人士指导如何清洗封口机刀片。 封口机刀片的清洗步骤
耐雪专业人士介绍,首先制作一个塞子堵住出水口,在下托盘凹槽内处塞进纸巾,在加入少量温水,开机之后按下安全门,齿刀进行几次上下压后,再将纸巾取出,拔掉塞子,清理脏水。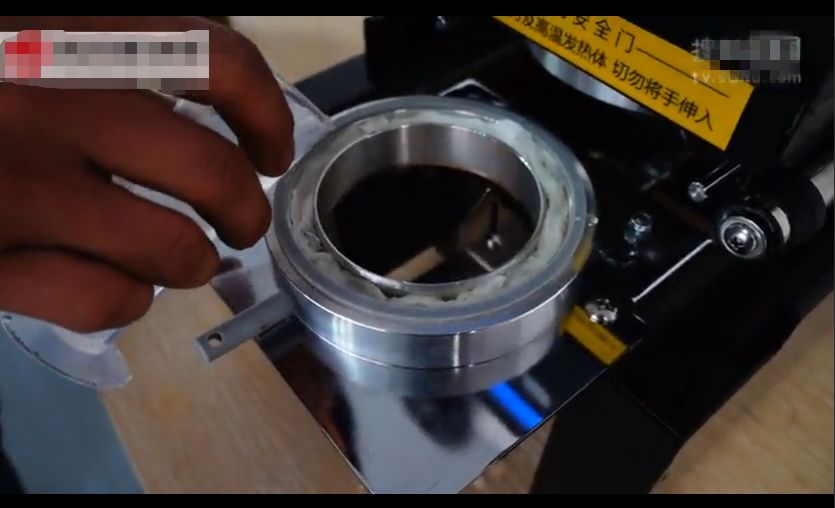
这种方式是通过刀片与纸巾的摩擦起到擦拭刀片的效果。注意:不能用布,否则会损坏齿刀。铠玮乃士专业人士介绍:用塞子堵住出水口,在凹槽中放入温水,开机—按启动进入—使用不透光卡片遮住电眼模拟胶膜进入—等待一秒关机。3—5分钟开机、清除污水、进行几次上下压、清除残渣杂质。这种方式是在槽内倒入温水,浸泡一段时间,反复几次上下压,通过温水浸透杂质并使它脱离刀片,会起到更深层次的清洁。
当然,两位专业人士也表示可以两种方法交错来使用,先浸泡几次溶解杂质,再使用塞纸巾式的方法擦除一些通过浸泡已经松动的杂质。 封口机的日常维护
封口机不光要保持清洁,日常的基本维护也需要了解一些,我们再来看看如何给轨道加油。
下模加油:首先将封口机关机,再使用毛巾擦拭封口机左边两处滑槽、中间两个钢杆和右边两处滑槽的杂质,擦拭干净后准备上油脂,依次从封口机左边两处滑槽、中间两个钢杆和右边两处滑槽6处部位加油,加油完毕后利用启动与急停按钮反复进行润滑。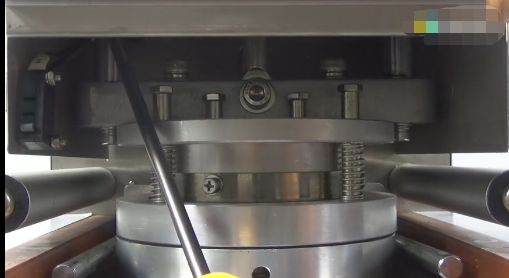
上模加油:先将封口机进入使用不透光卡片遮住电眼模拟胶膜进入,然后关机。接下来抬起安全挡板,在左右两边的柱子加上润滑油,最后利用启动与急停按钮反复进行润滑。一台封口机好不好用,也在于你日常的保养,保养好了,也会避免出现封口不严、封口膜断裂和噪音大等问题。
—————END—————
中国饮品快报编辑|小W 版式|小N
我们致力于为奶茶、咖啡行业提供全面而独到的资讯促进行业的健康发展
快报精选 | 好原料点击下方logo去了解


你关闭电源调整胶膜后还是没有解决问题,这时你就要看看封口机的刀片上是否有一层厚厚的积碳了。
这是胶膜高温之后留下的残渣碳化,是在操作时避免不了的问题。那如何清洗封口机刀片上的积碳呢?
我们联系了铠玮乃士、耐雪两家封口机专业厂商,让专业人士指导如何清洗封口机刀片。
封口机刀片的清洗步骤耐雪专业人士介绍,首先制作一个塞子堵住出水口,在下托盘凹槽内处塞进纸巾,在加入少量温水,开机之后按下安全门,齿刀进行几次上下压后,再将纸巾取出,拔掉塞子,清理脏水。
这种方式是通过刀片与纸巾的摩擦起到擦拭刀片的效果。注意:不能用布,否则会损坏齿刀。铠玮乃士专业人士介绍:用塞子堵住出水口,在凹槽中放入温水,开机—按启动进入—使用不透光卡片遮住电眼模拟胶膜进入—等待一秒关机。3—5分钟开机、清除污水、进行几次上下压、清除残渣杂质。这种方式是在槽内倒入温水,浸泡一段时间,反复几次上下压,通过温水浸透杂质并使它脱离刀片,会起到更深层次的清洁。
当然,两位专业人士也表示可以两种方法交错来使用,先浸泡几次溶解杂质,再使用塞纸巾式的方法擦除一些通过浸泡已经松动的杂质。
封口机的日常维护封口机不光要保持清洁,日常的基本维护也需要了解一些,我们再来看看如何给轨道加油。
下模加油:首先将封口机关机,再使用毛巾擦拭封口机左边两处滑槽、中间两个钢杆和右边两处滑槽的杂质,擦拭干净后准备上油脂,依次从封口机左边两处滑槽、中间两个钢杆和右边两处滑槽6处部位加油,加油完毕后利用启动与急停按钮反复进行润滑。
上模加油:先将封口机进入使用不透光卡片遮住电眼模拟胶膜进入,然后关机。接下来抬起安全挡板,在左右两边的柱子加上润滑油,最后利用启动与急停按钮反复进行润滑。一台封口机好不好用,也在于你日常的保养,保养好了,也会避免出现封口不严、封口膜断裂和噪音大等问题。
—————END—————
中国饮品快报编辑|小W 版式|小N
我们致力于为奶茶、咖啡行业提供全面而独到的资讯促进行业的健康发展
快报精选 | 好原料点击下方logo去了解