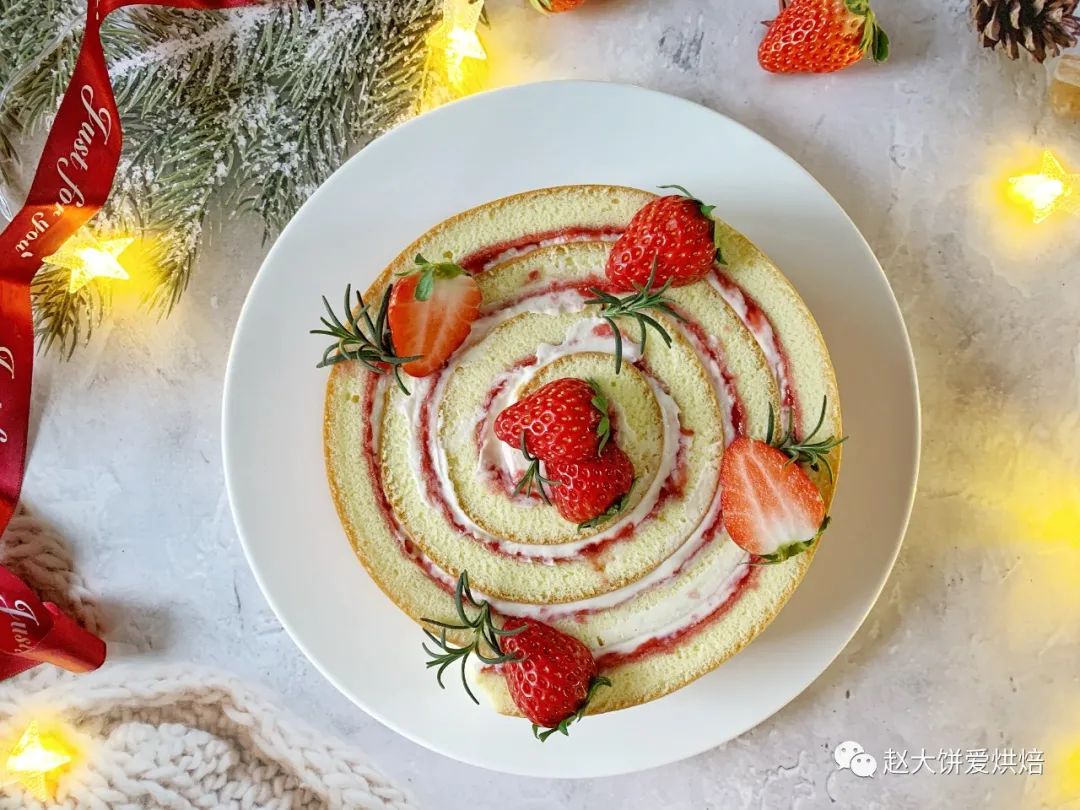
还有不到一个月就是圣诞了,圣诞蛋糕的装饰怎么能少得了草莓呢。现在草莓刚上季,我就迫不及待给大家分享草莓酱的做法,还用草莓酱做了下面这款草莓年轮蛋糕。

年轮蛋糕在欧洲国家被视为“蛋糕之王”,也是圣诞节庆的蛋糕,外形如年轮一般层层叠叠,环环相抱,象征着美好的寓意。传统的年轮蛋糕是用杏仁蛋糕胚,加上果茸的。我在传统的外形上,用了常见的材料做了松软的小四卷,搭配草莓果茸,和奶油奶酪酱,一口三种口味,超幸福的口感。一层柔软的蛋糕,一层新鲜草莓熬制的酸甜草莓酱,一层奶香浓郁的奶油奶酪糊,层层叠叠的外形,不需要抹面,也不怕把蛋糕卷裂,简单装饰就很好看,今年圣诞蛋糕就是它了。

草莓年轮蛋糕
↓视频版教程↓↓图文版教程↓

草莓酱新鲜草莓300克细砂糖100克柠檬汁15克蛋糕胚鸡蛋4个牛奶40克玉米油40克细砂糖40克低筋面粉40克奶油奶酪糊奶油奶酪60克淡奶油60克细砂糖8克

制作草莓酱:①草莓洗干净,切块,加入细砂糖搅拌均匀,盖上盖子,糖渍2小时以上,或直接冷藏过夜,析出果酱。这个配方的草莓和糖的比较是3:1,不建议大量减糖,糖是有利果酱的保存的,不易发霉。

②糖渍2小时以后,已经析出果酱了,中小火熬煮,蒸发部分水分。

③一边加热,一边不停搅拌,直到草莓煮软,加入柠檬汁。柠檬汁可以抗氧化,延长保质期的作用。
④继续煮至浓稠的果酱。趁热装入提前已经消毒的瓶子,盖好盖子,倒扣冷却后放入冰箱冷藏保存。自制的草莓酱无添加剂,要尽快食用哦。

制作蛋糕胚:①玉米油和牛奶搅拌均匀。

②筛入低粉,搅拌至看不见干粉。

③加入蛋黄,以划Z字的手法,搅拌顺滑细腻。

④提前预热烤箱160度。打发蛋白,分三次加入细砂糖,打发至湿性发泡,大弯勾的状态。

⑤先取三分之一蛋白与蛋黄糊翻拌均匀。
⑥将翻拌均匀的蛋黄糊,倒回剩余蛋白里,继续翻拌均匀。

⑦烤盘28*28铺上油纸,倒入蛋糕糊,抹平,震去大气泡。

⑧放入烤箱中层,160度,烤25分钟左右,具体时间温度,请根据自家烤箱调整。
⑨蛋糕胚可以做正卷也可以做毛巾卷。我用到的是正卷,出炉以后,稍微放凉,铺一张干净的油纸倒扣过来,撕开底部油纸,再翻过来放凉。

制作奶酪糊:①奶油奶酪隔着热水压拌顺滑,加入细砂糖,搅拌均匀。

②加入淡奶油,搅拌均匀。上一步奶油奶酪软化到位,压拌顺滑,加入淡奶油后,也不会有颗粒的。

③自制的草莓酱,可以用料理机打成草莓茸。草莓酱的颗粒太大,会影响蛋糕的美感。

④放凉的蛋糕胚,切除四周,更平整,再平均分成5份,宽度5cm左右。

⑤加入一层草莓茸,抹均匀。

⑥加入一层奶油奶酪糊抹均匀。

⑦将已经分割好的一片蛋糕胚卷起来,摆在碟子中。

⑧第二片蛋糕胚围着第一个蛋糕圈继续卷起来,重复把所有蛋糕胚都围起来。

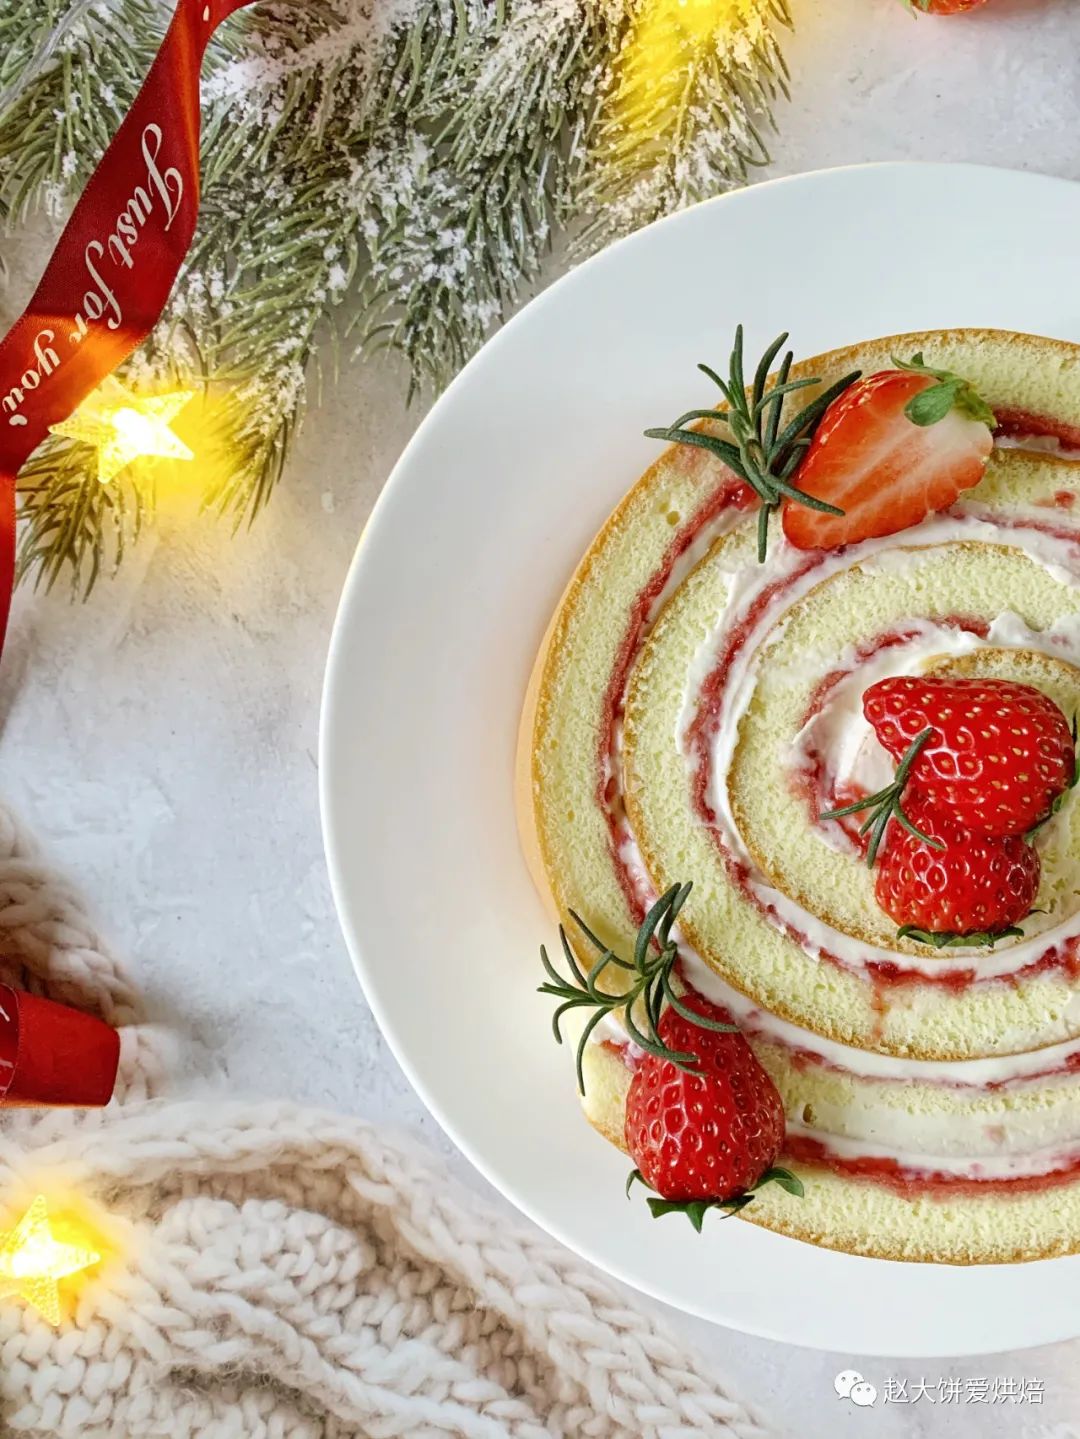
表面可以加入草莓薄荷叶做装饰,也可以放入圣诞饰品来做装饰,这样更有圣诞气氛。

这样的年轮层层叠叠的做法,不需要抹面,也不用担心把蛋糕卷裂,新手也可以做出很漂亮的圣诞蛋糕。柔软的蛋糕胚,酸甜的草莓酱,浓郁的奶油奶酪,三种口味的搭配,简直就是幸福的味道。
除了原味蛋糕胚,大家可以做成抹茶味、可可味或红丝绒的。同样中间的草莓果酱也可以换成蓝莓果酱,掌握了做法,就可以做出不同口味了。
小贴士:1、自制草莓酱,糖的比例越高,保存时间越长。这配方的草莓和糖的比例是3:1.2、自制草莓酱没有添加剂,尽快食用,注意每次挖果酱的工具勺子这些是干净没有水的。3、传统的年轮蛋糕胚是用大量杏仁粉做的杏仁蛋糕胚,我换成了小四卷,也可以把蛋糕胚换成抹茶味、可可味或红丝绒的。草莓果酱也可以换成蓝莓酱。如果有其他疑问请在下方留言给我们看到后一定尽力回复大家♪(^∇^*)

3步搞定,超级简单
0难度,人人夸

三种口味,Q弹软糯

简单一蒸,妙不可言


喜欢这个食谱,就点个“在看”和“赞”吧~
预览时标签不可点